Setting Up Google Cloud Platform
The integration process begins with configuring your Google Cloud Platform (GCP) project. This setup involves creating the necessary OAuth credentials and configuring the consent screen that users will see when signing in to your application.Configuring the OAuth Consent Screen
Start by visiting the Google Cloud Console and either create a new project or select an existing one. Navigate to the OAuth consent screen configuration where you’ll need to provide essential information about your application:- Application name
- User support email
- Developer contact information
- Authorized domains (add your Supabase project URL without the protocol, e.g.,
<project-id>.supabase.co)
Creating OAuth Credentials
After configuring the consent screen, you’ll need to set up OAuth 2.0 credentials for both web and mobile platforms. Please follow the steps carefully.Web Application Credentials
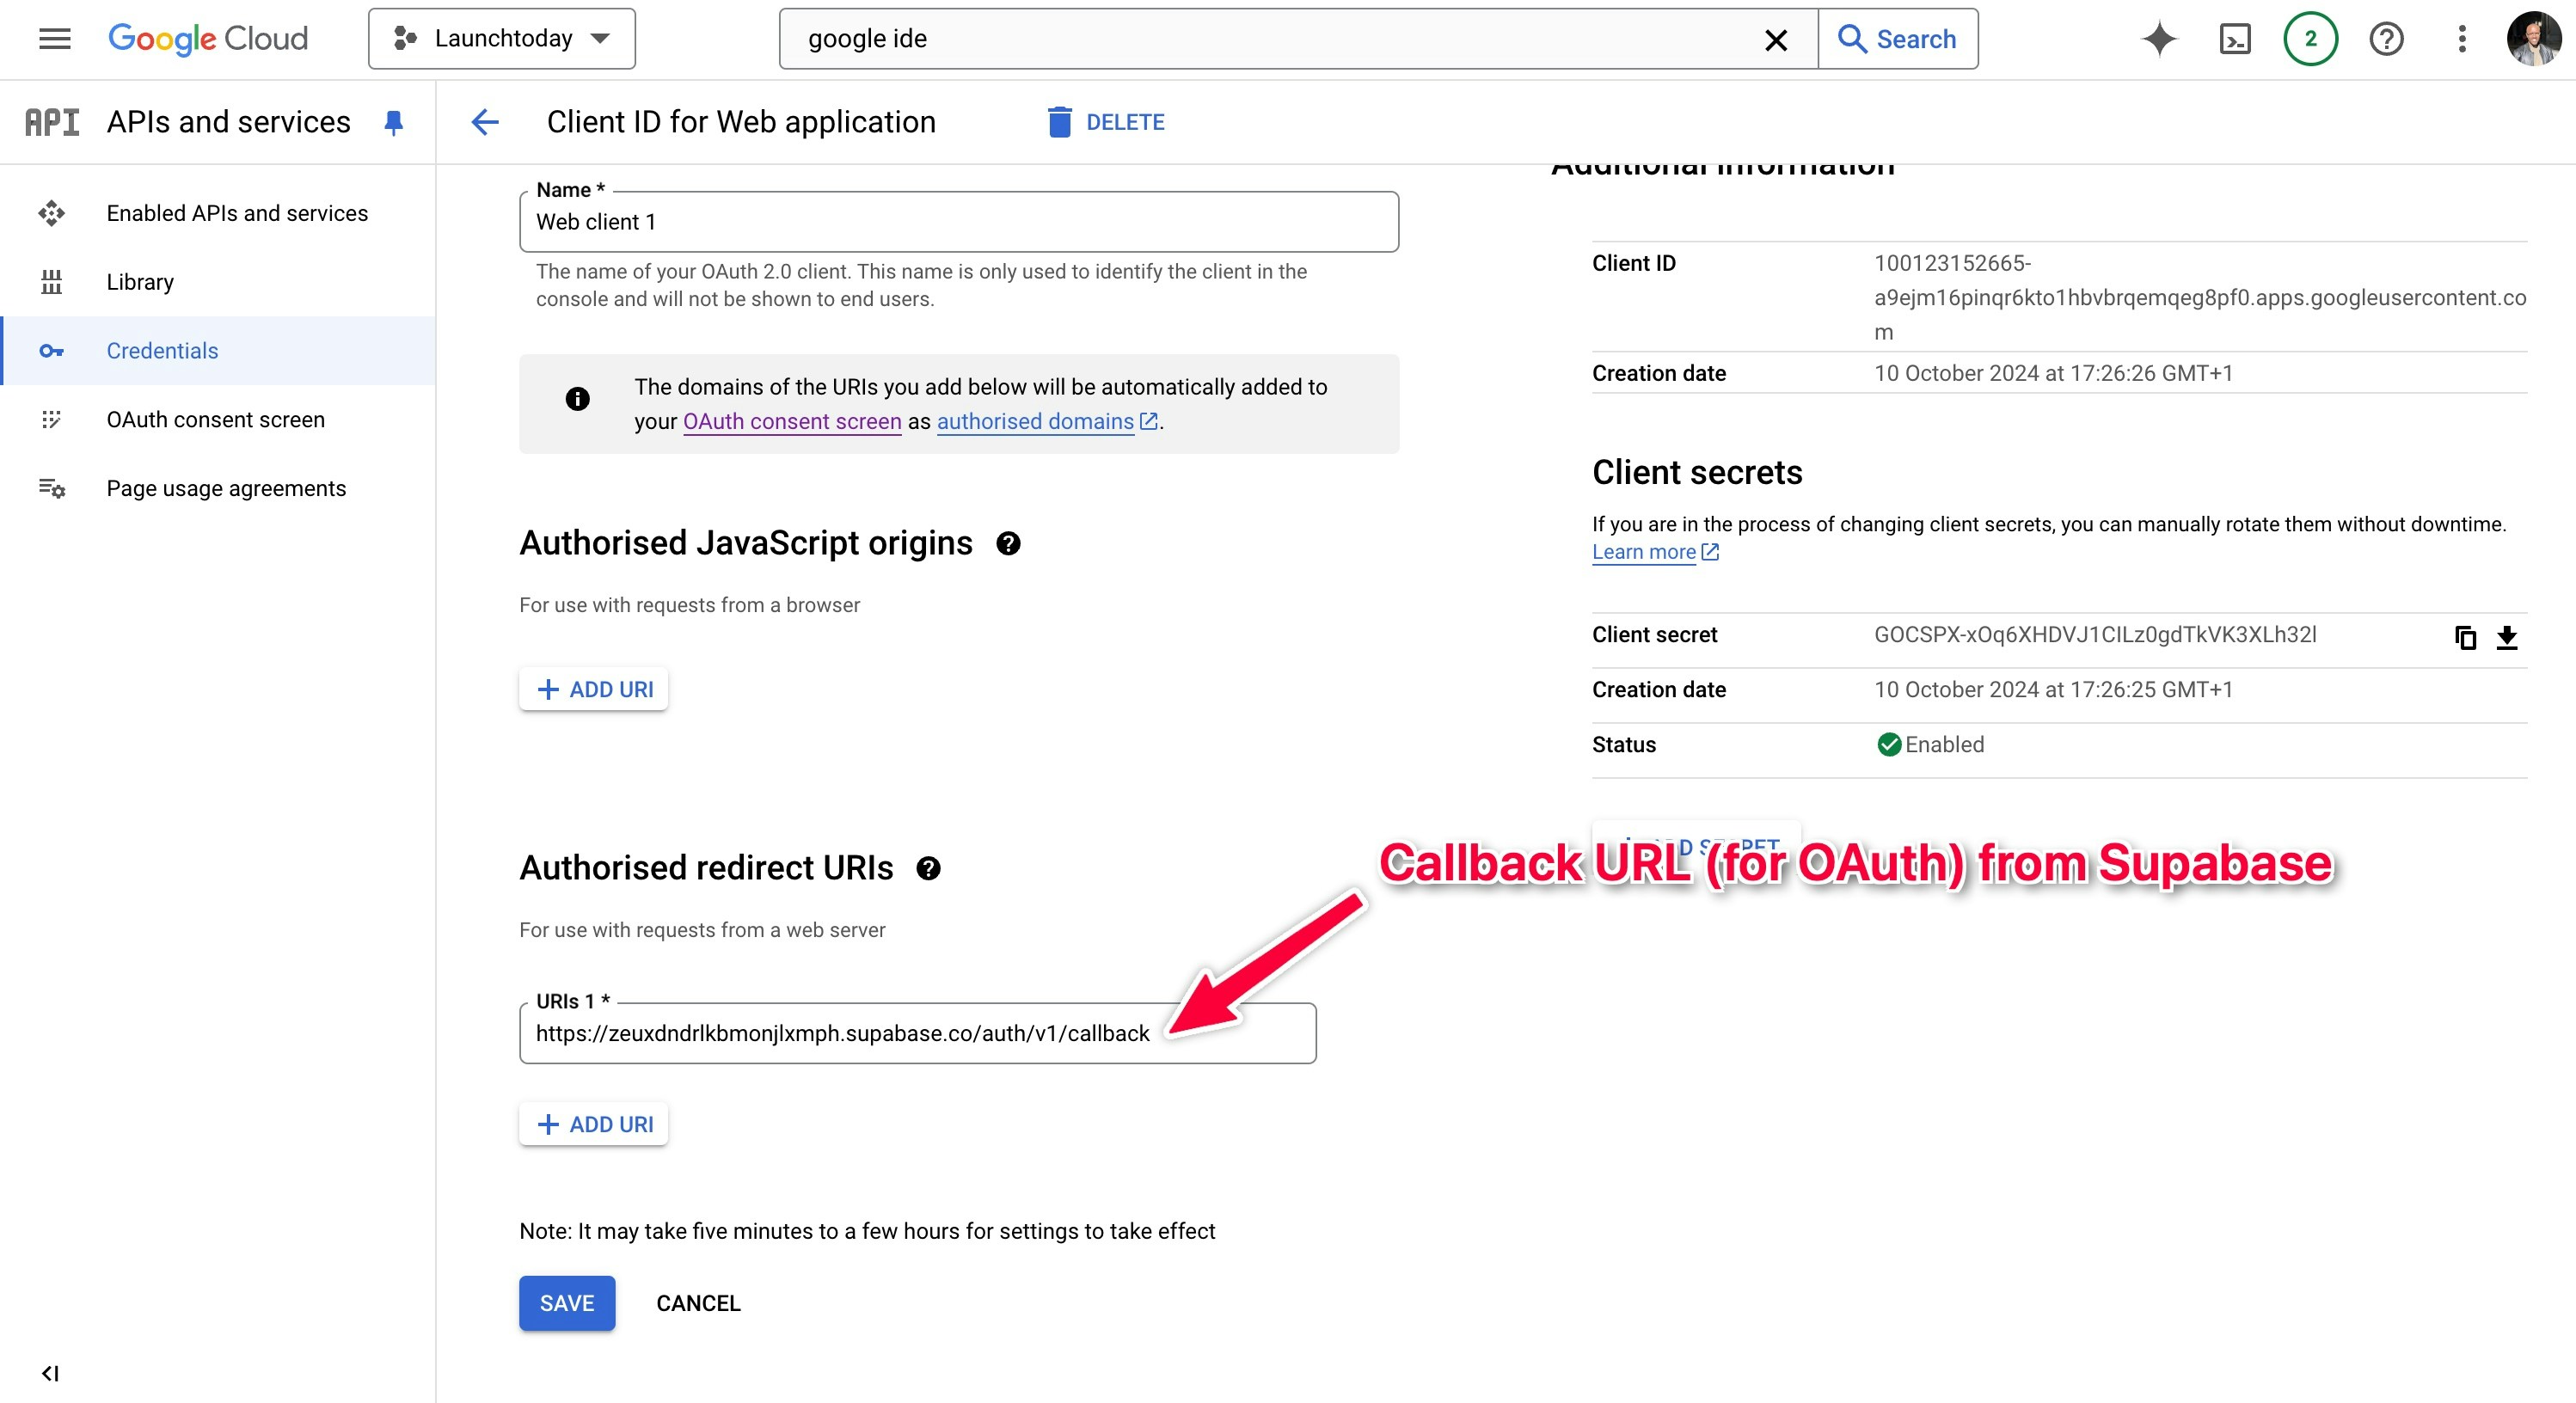
- In the Google Cloud Console, navigate to APIs & Services > Credentials
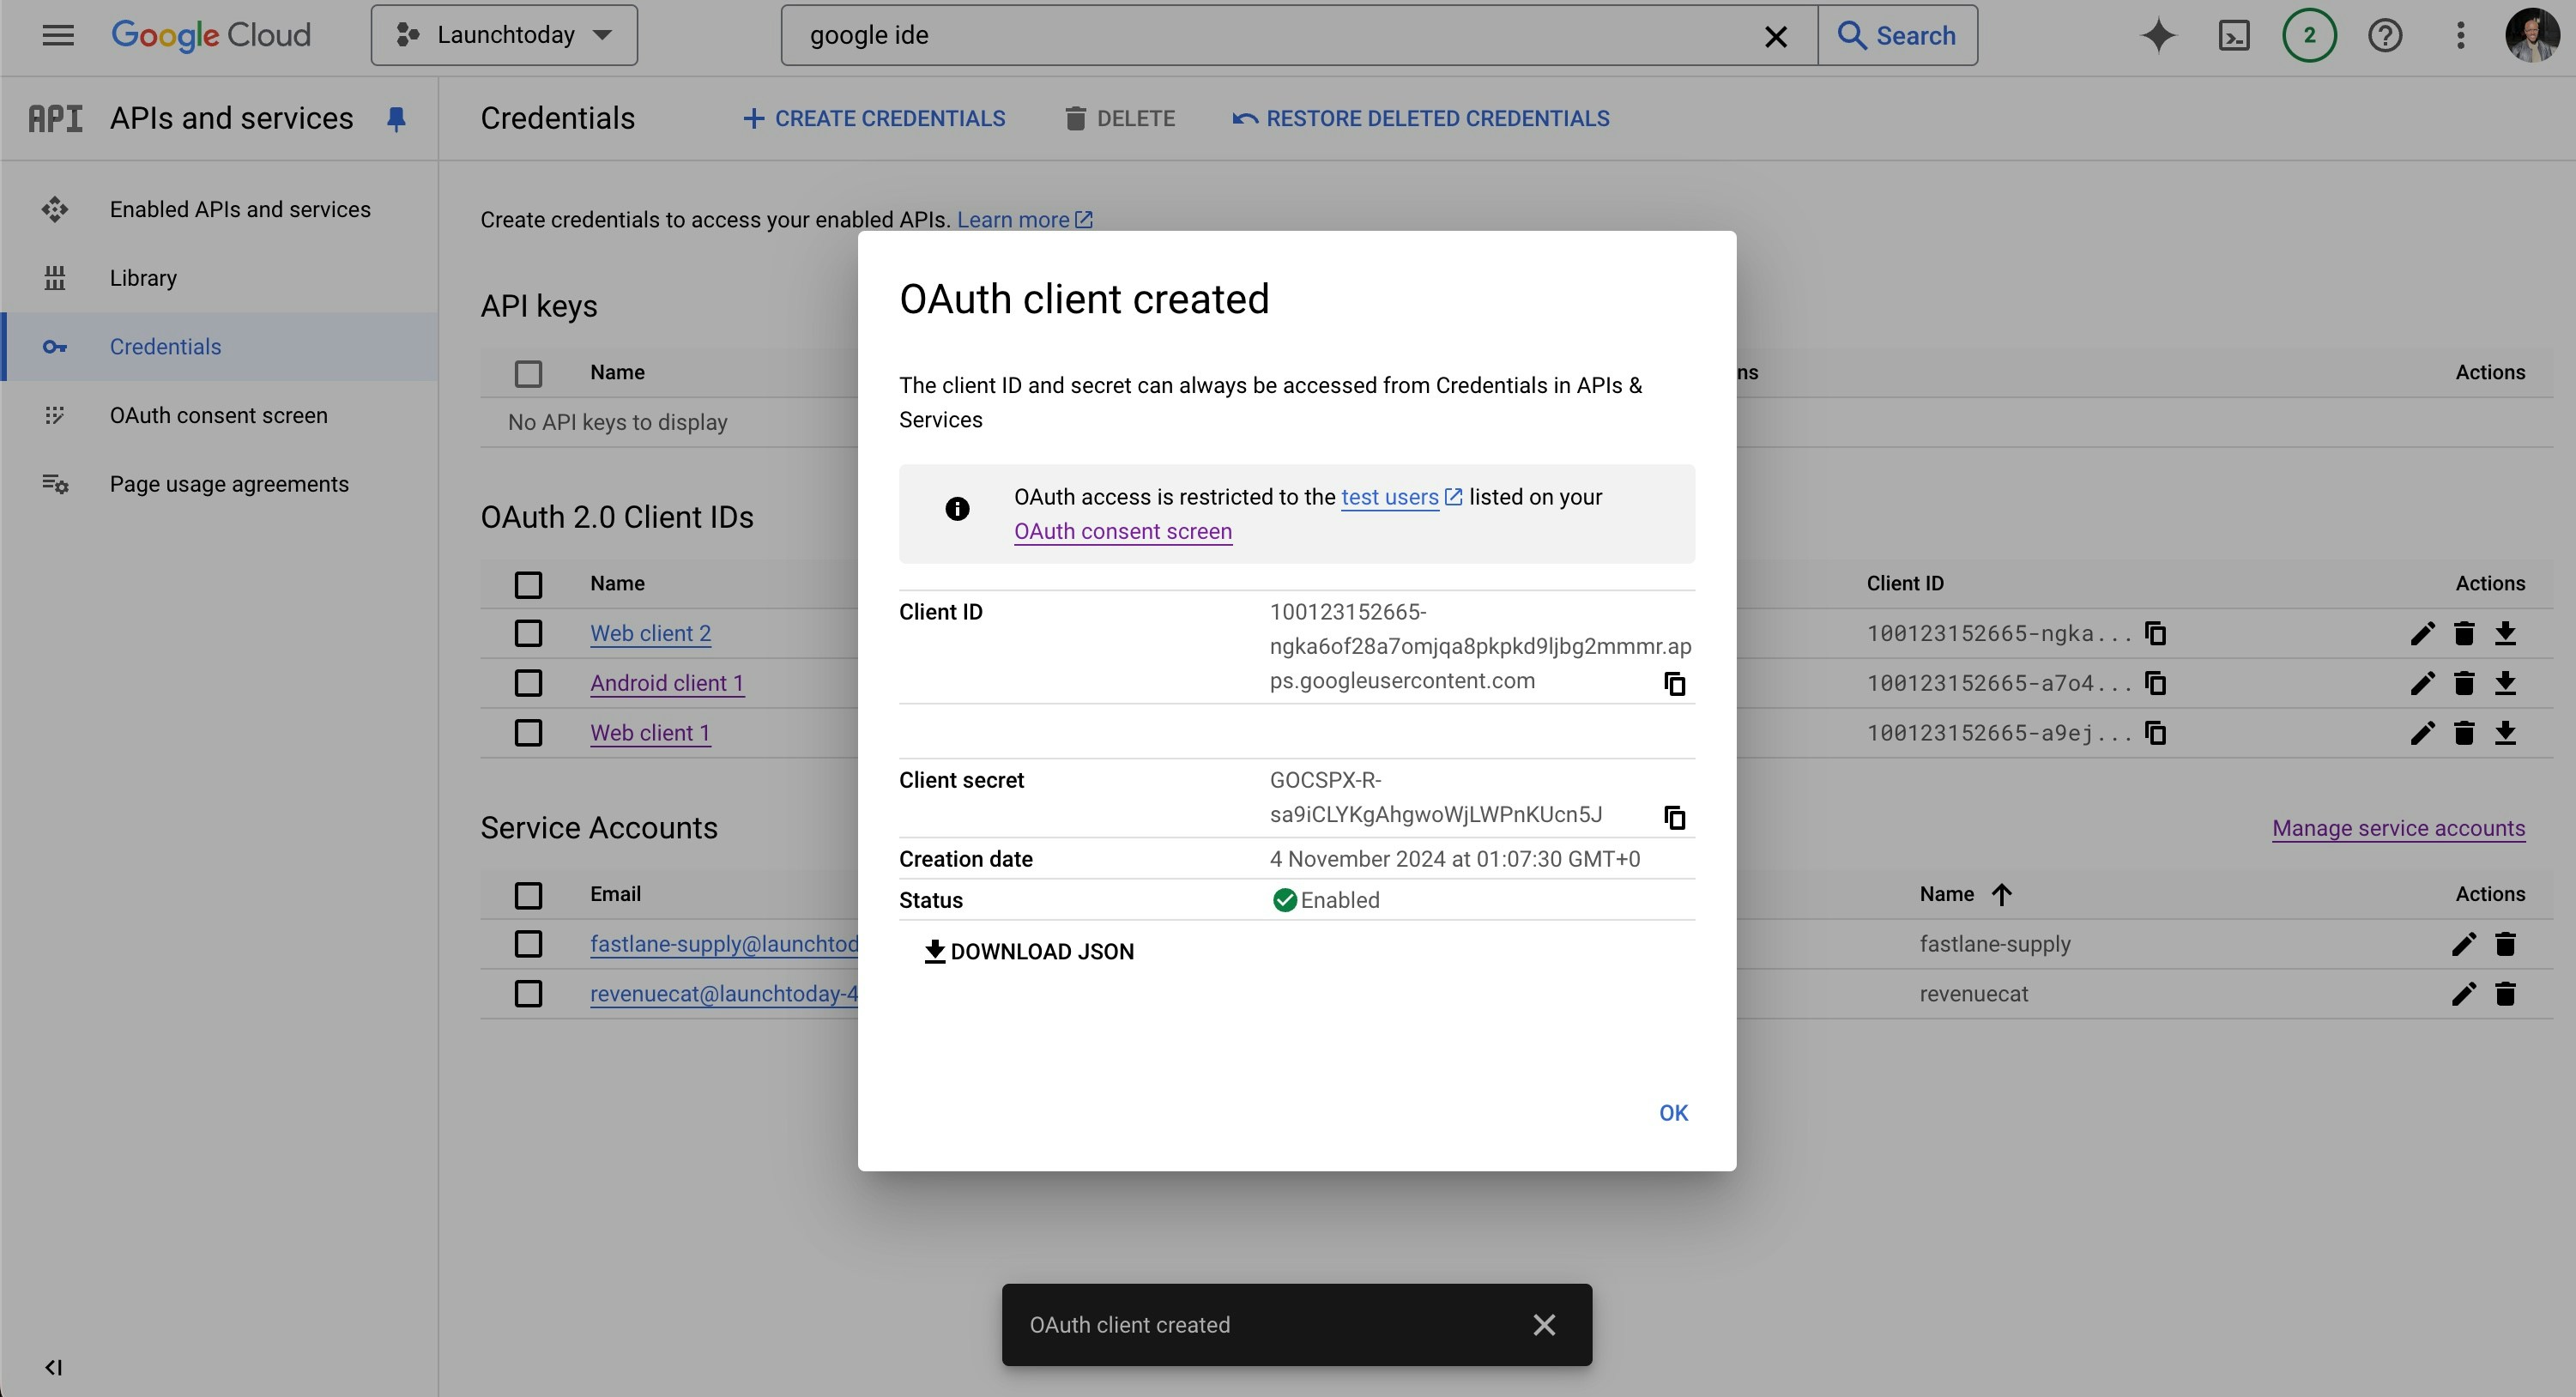
- Click “Create Credentials” and select “OAuth client ID”
- Choose “Web application” as the application type
- Configure the authorized redirect URIs using your Supabase callback URL
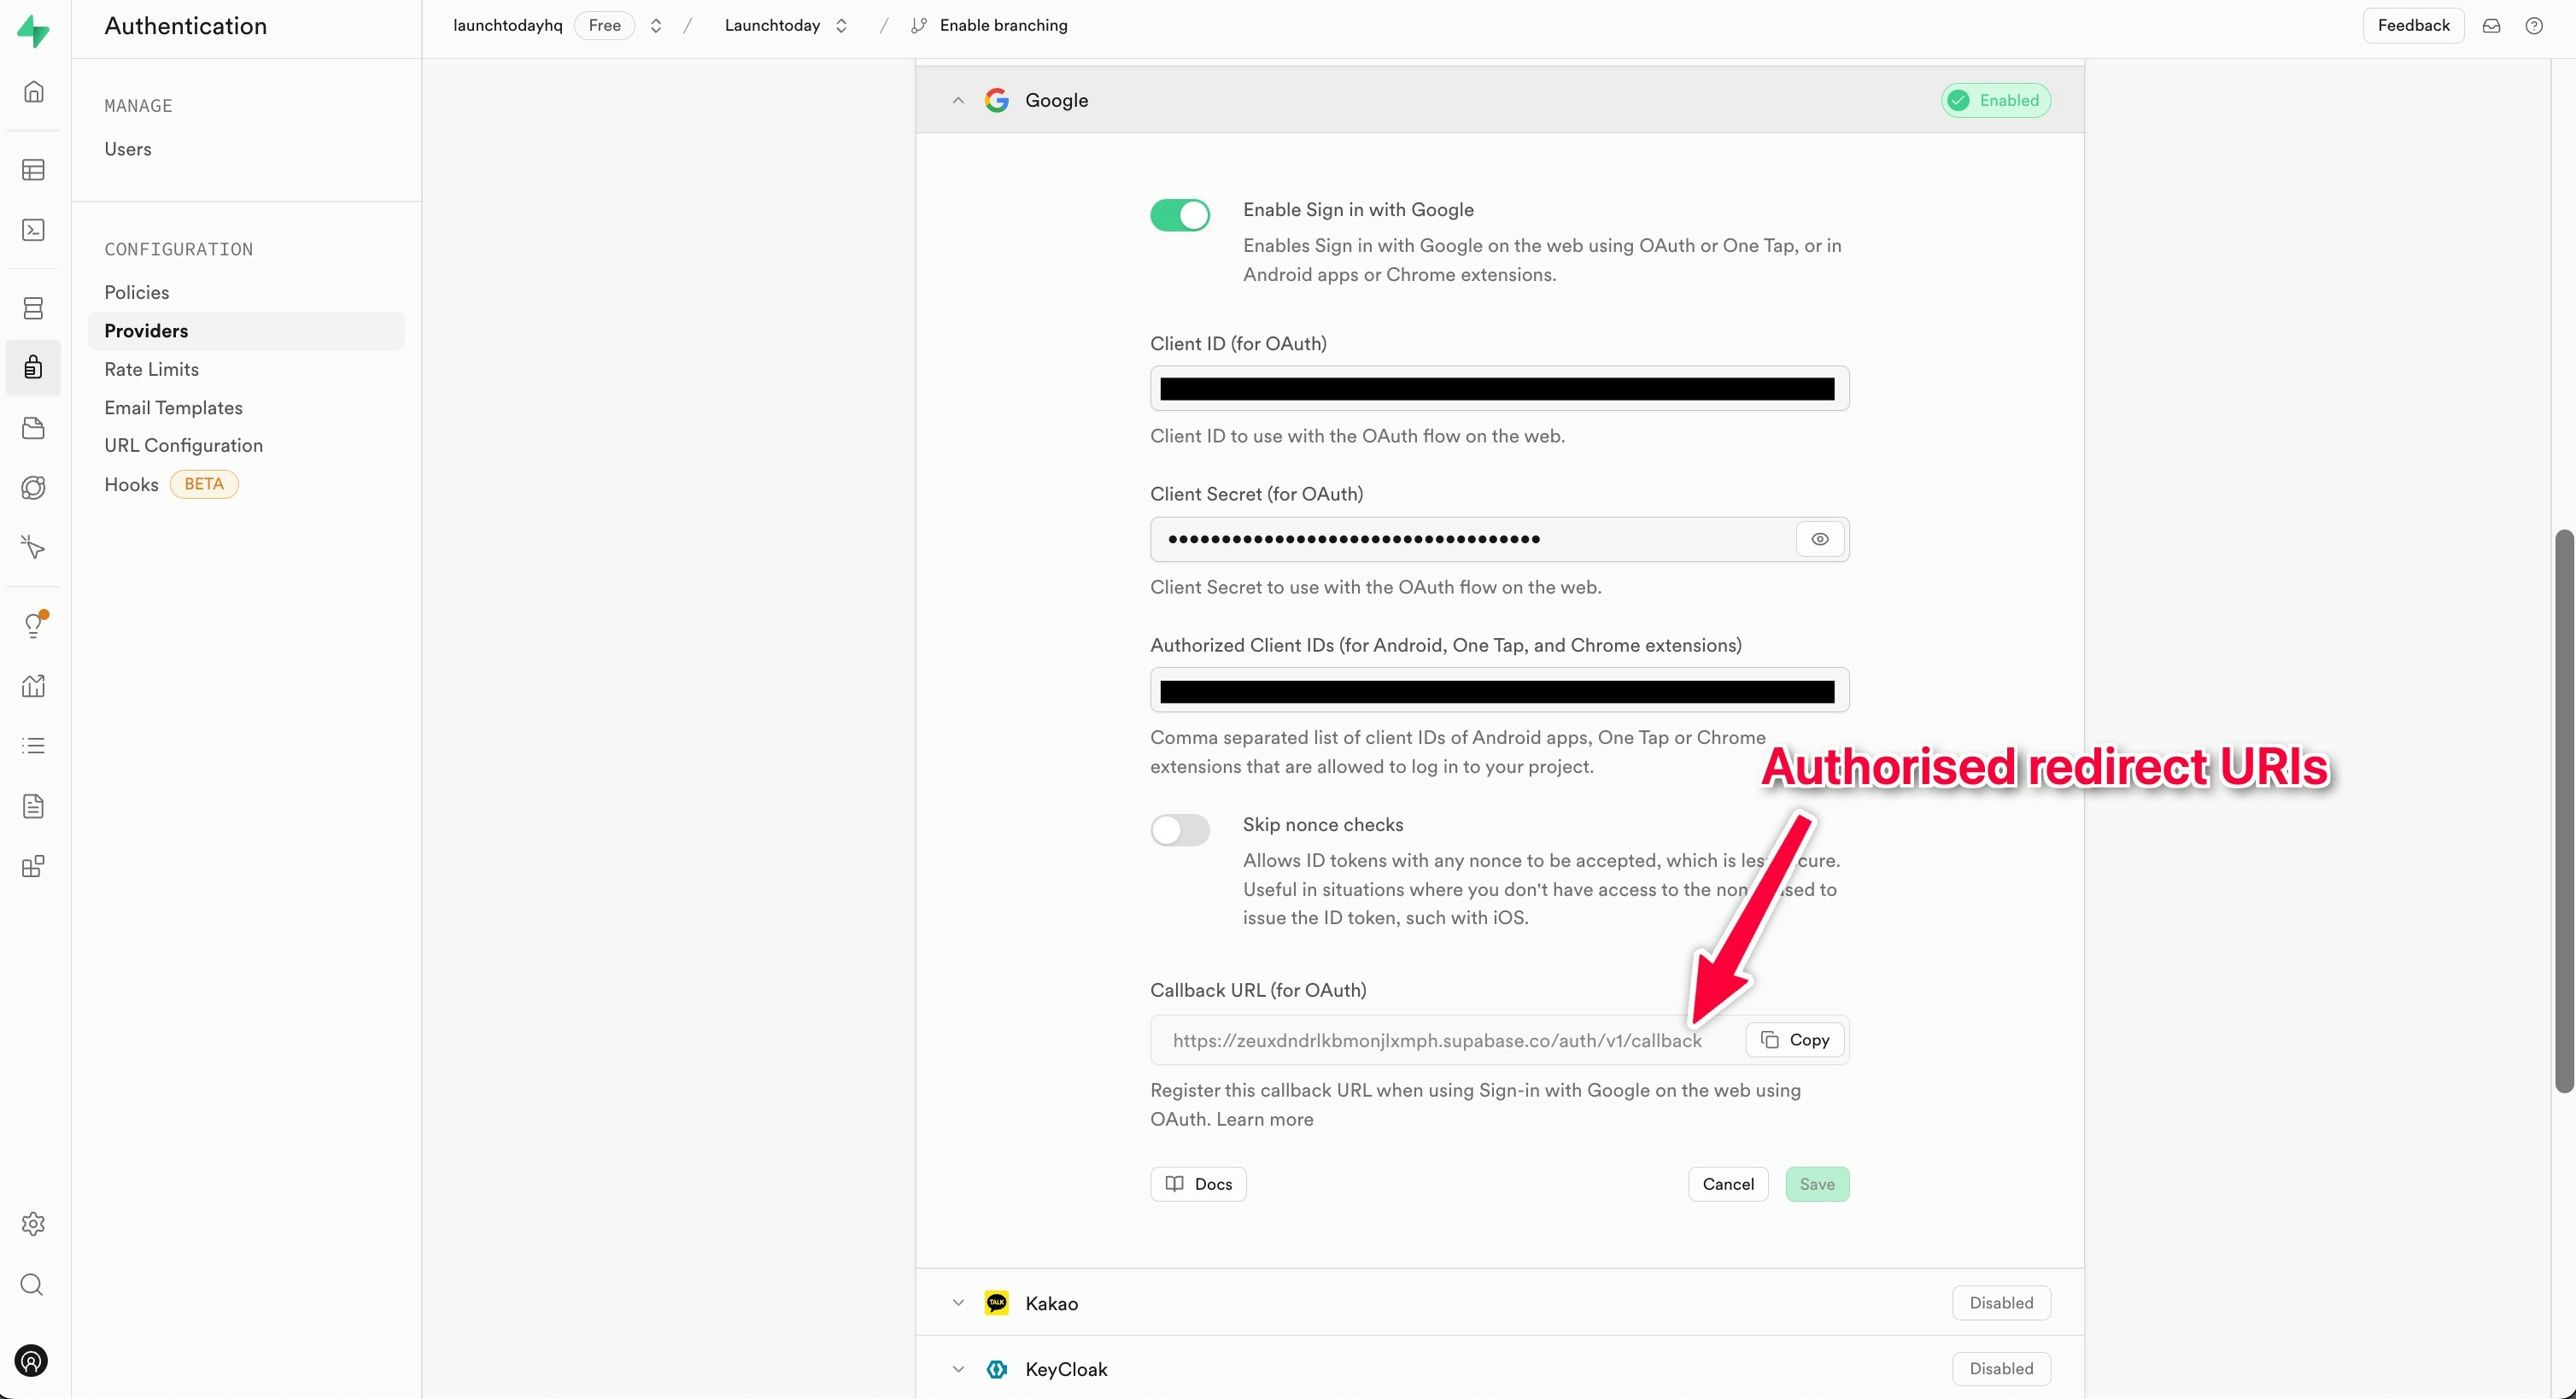
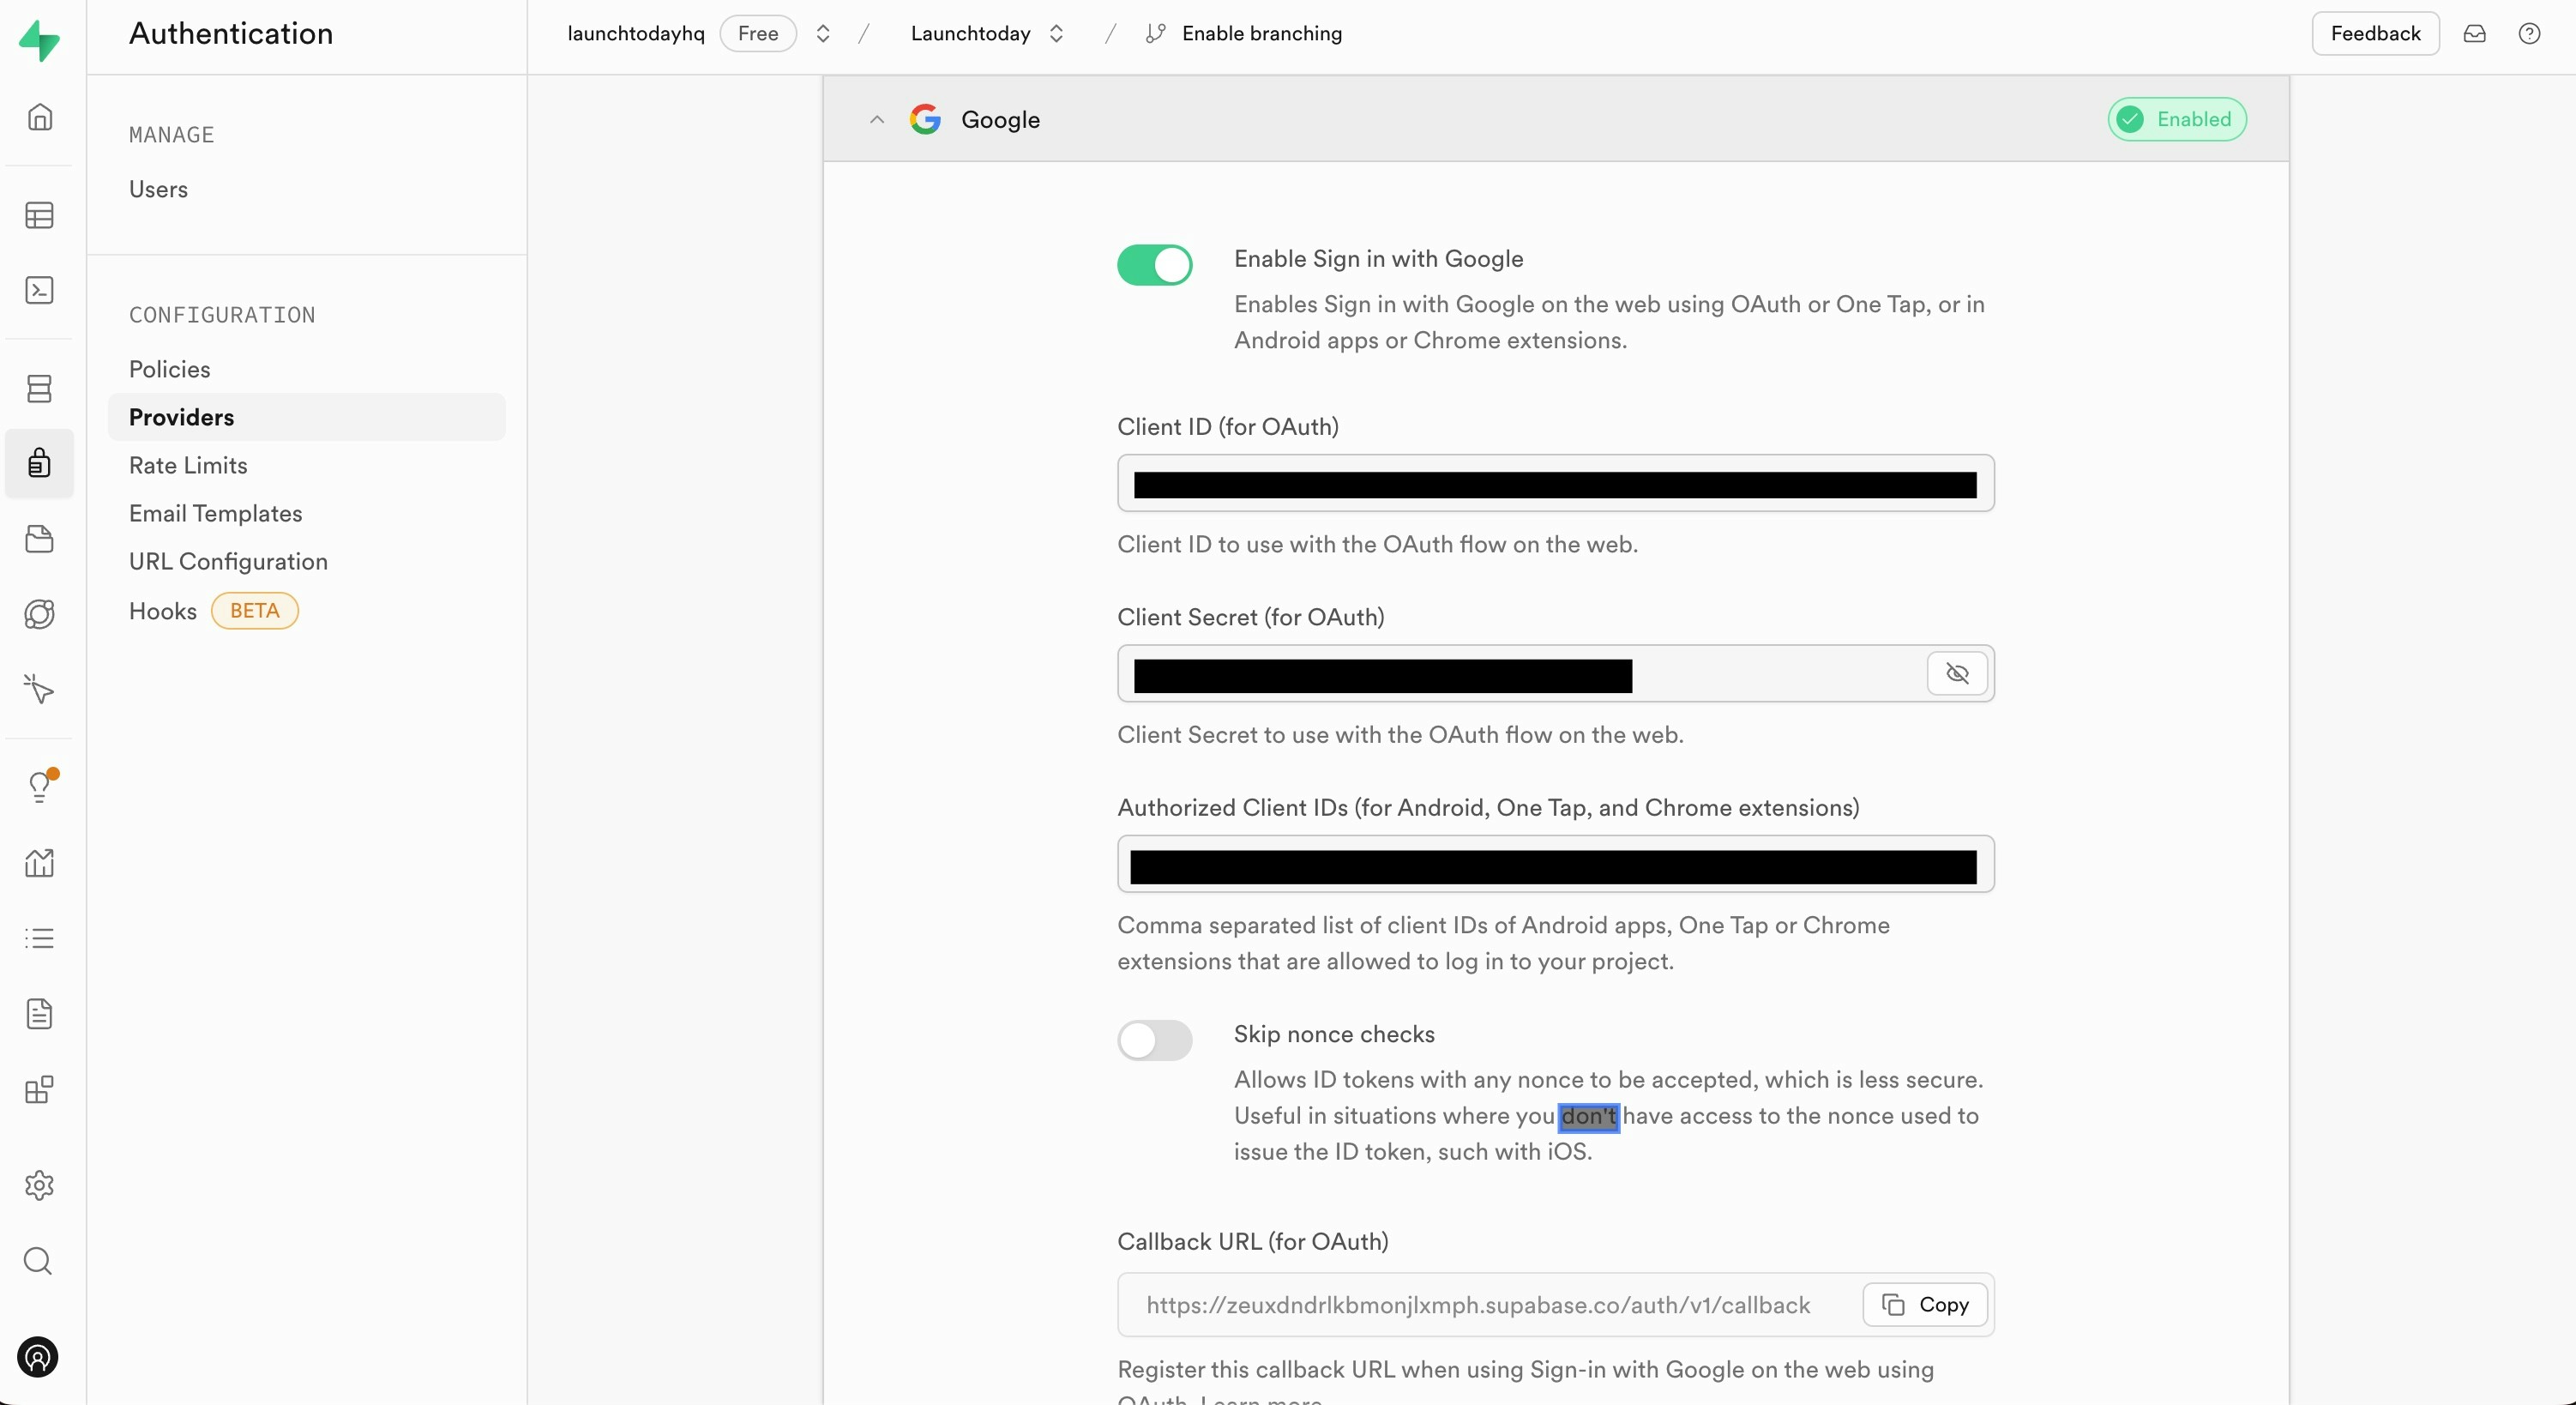
- In Supabase, navigate to the Authentication > Providers > Google
- Enable the Google provider (click the toggle by Enable Sign in with Google)
- Enter the Client ID and Client Secret obtained from Google Cloud Console
Android Application Credentials
For Android applications, additional credentials are required to ensure secure authentication and prevent unauthorized access to your Google Sign-in implementation.- Return to Google Cloud Console > APIs & Services > Credentials
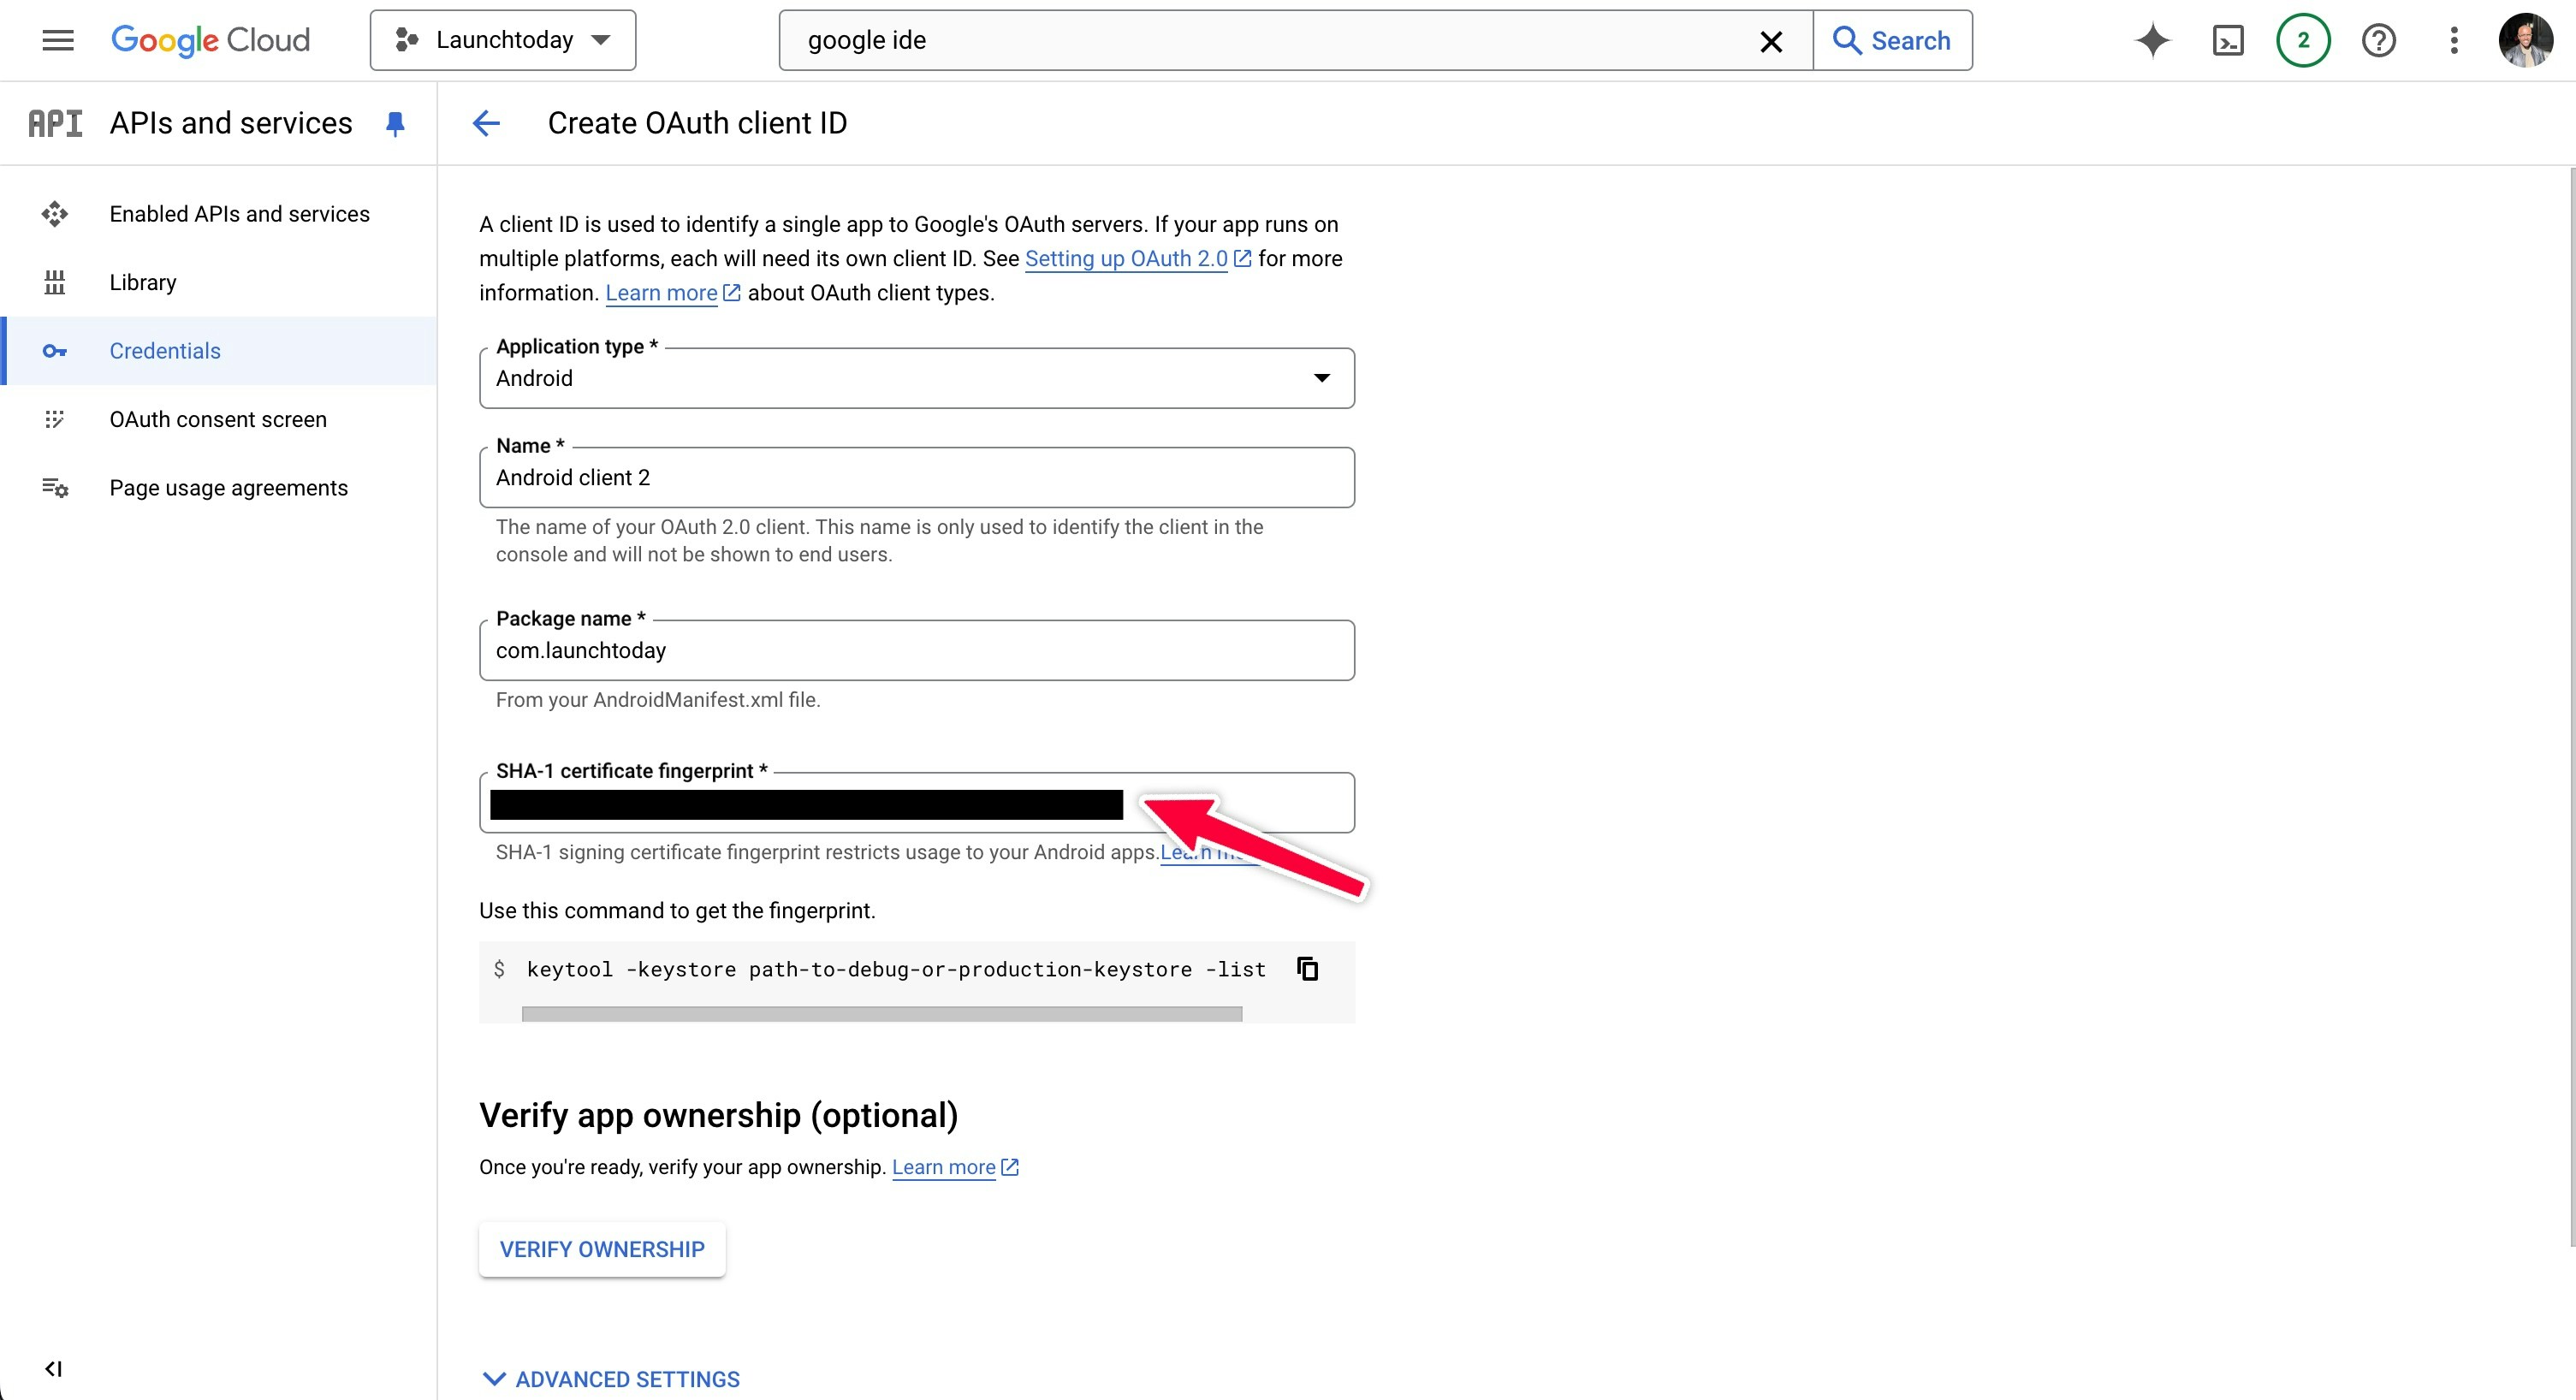
- Create another OAuth client ID, selecting “Android” as the application type
- Enter your application’s package name (e.g.,
com.launchtoday.app) - Add your SHA-1 certificate fingerprint (see below for details on how to create this)
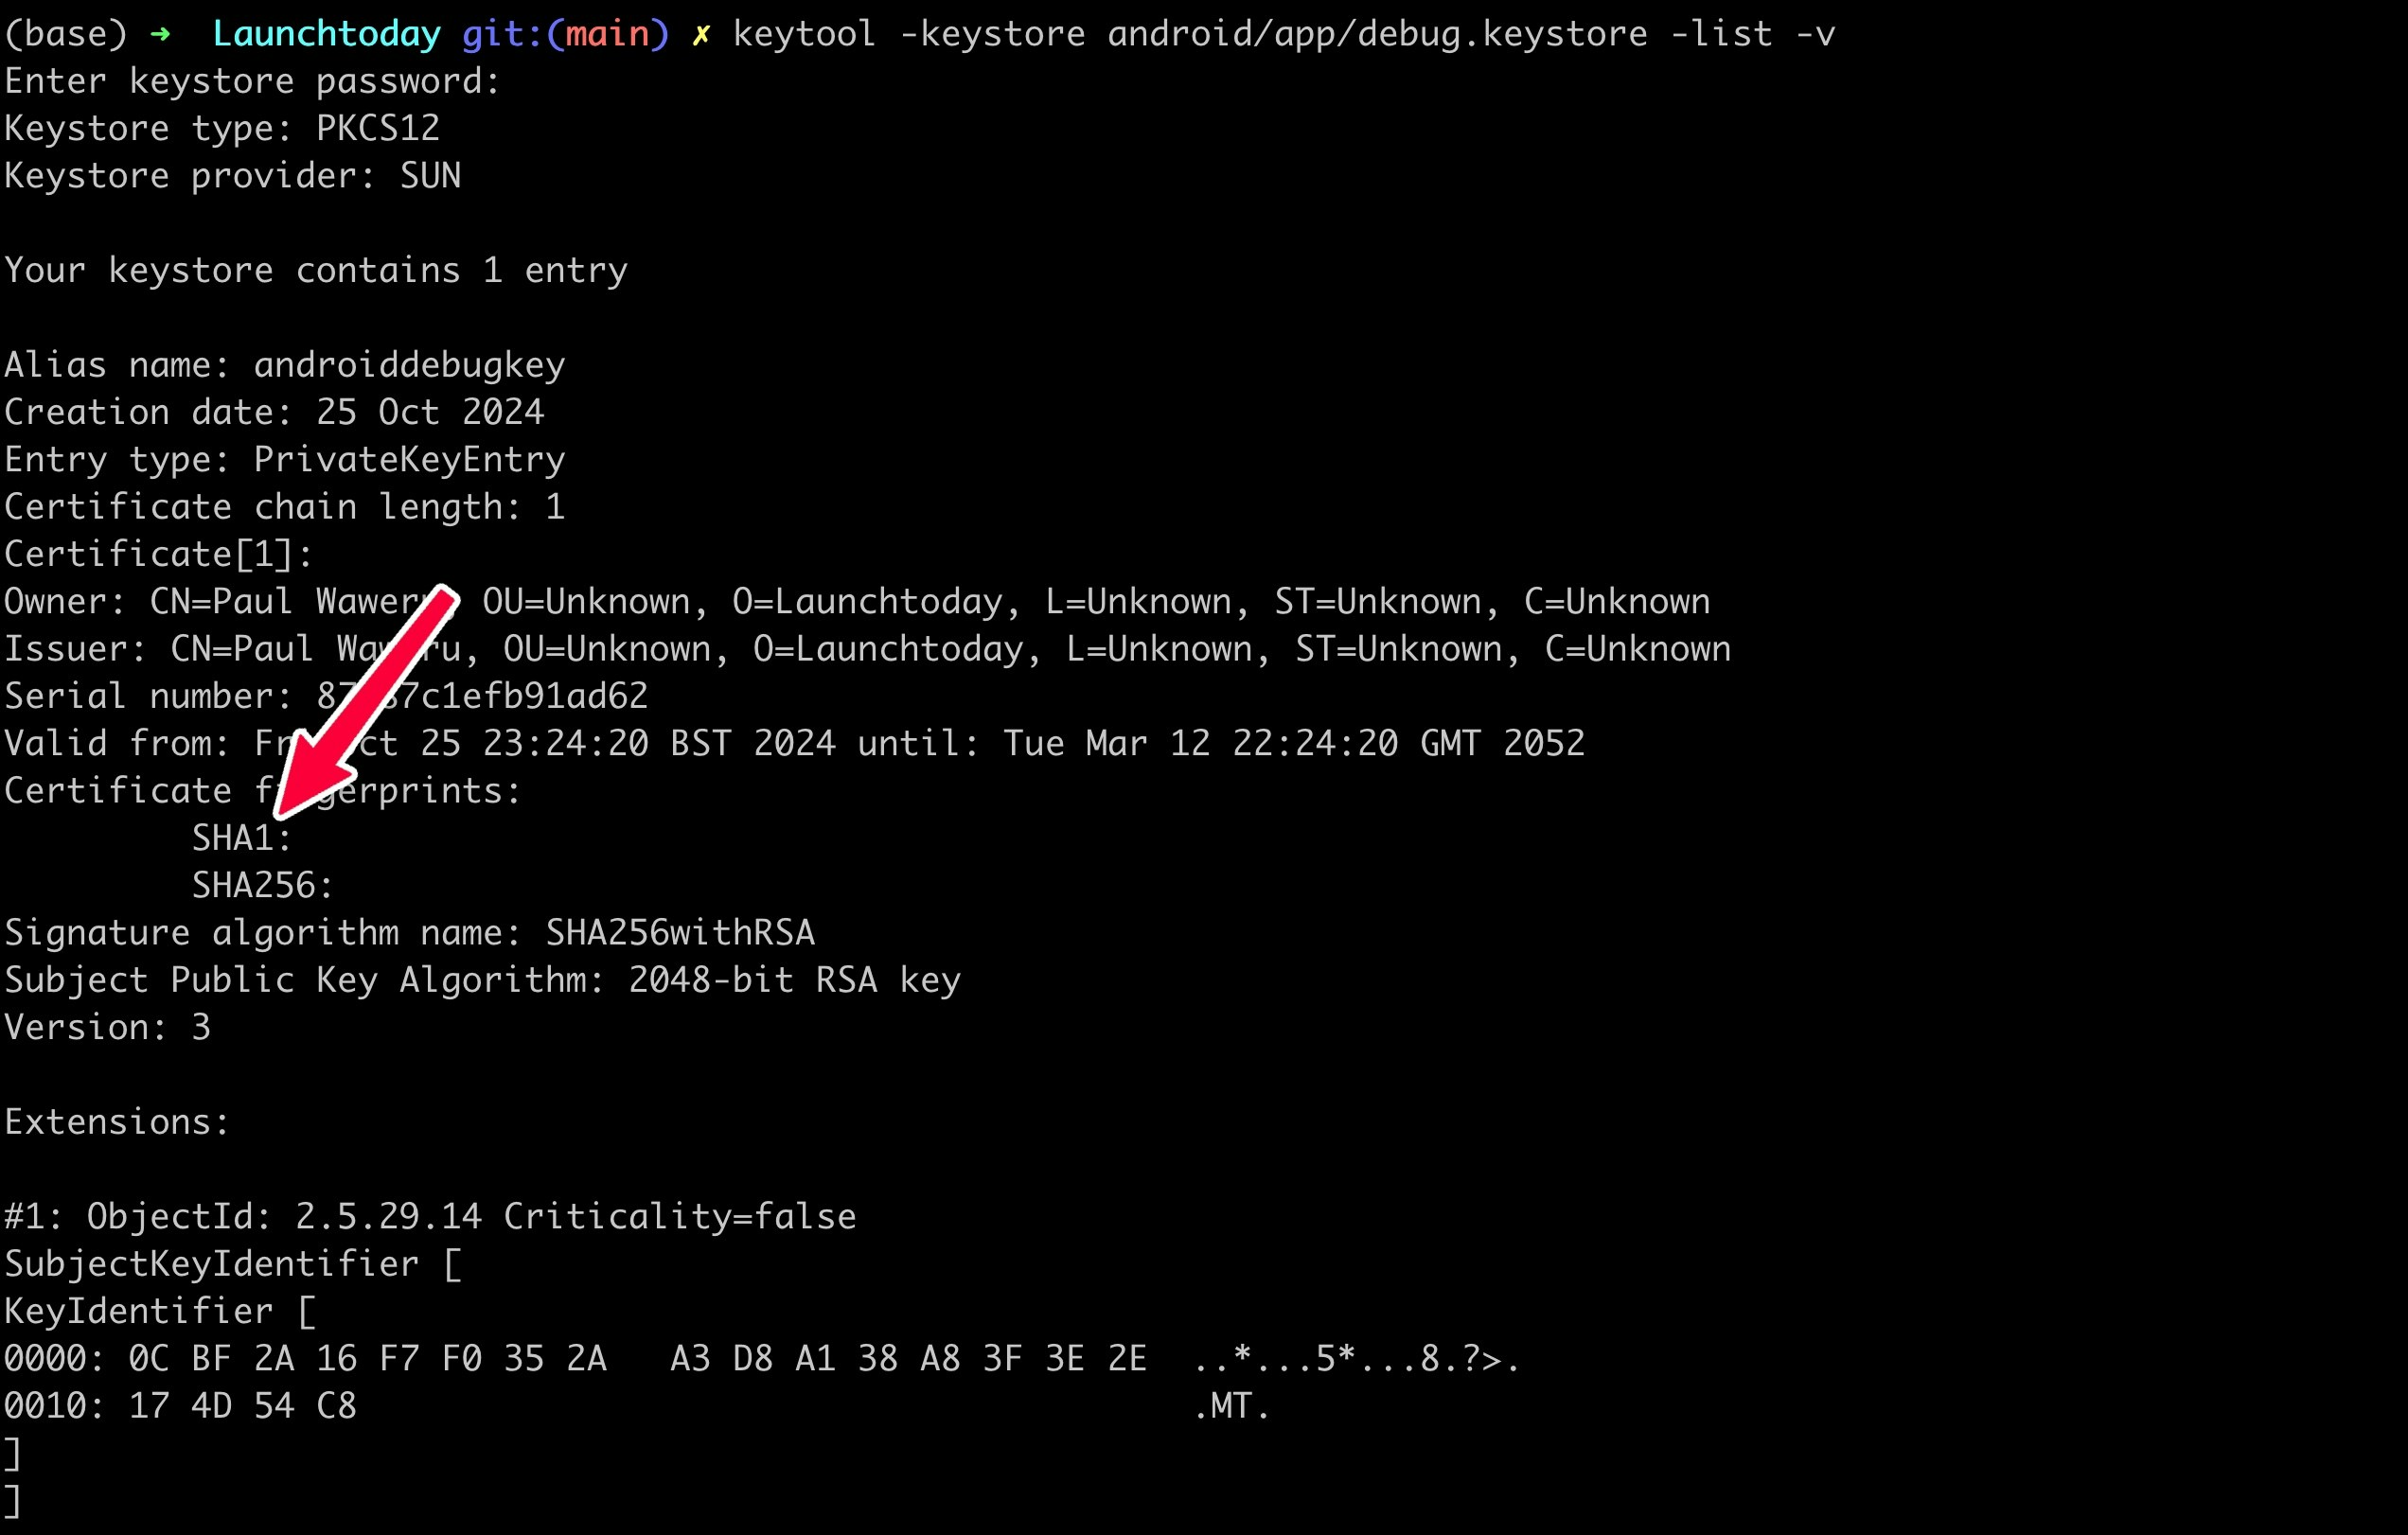
Generating SHA-1 Certificate Fingerprint
The SHA-1 fingerprint acts as a unique identifier for your Android application, helping Google verify that requests are coming from your legitimate app. To obtain your SHA-1 fingerprint, execute the following command from your project’s root directory:android as specified in your app’s build.gradle file). The command will output your SHA-1 fingerprint:
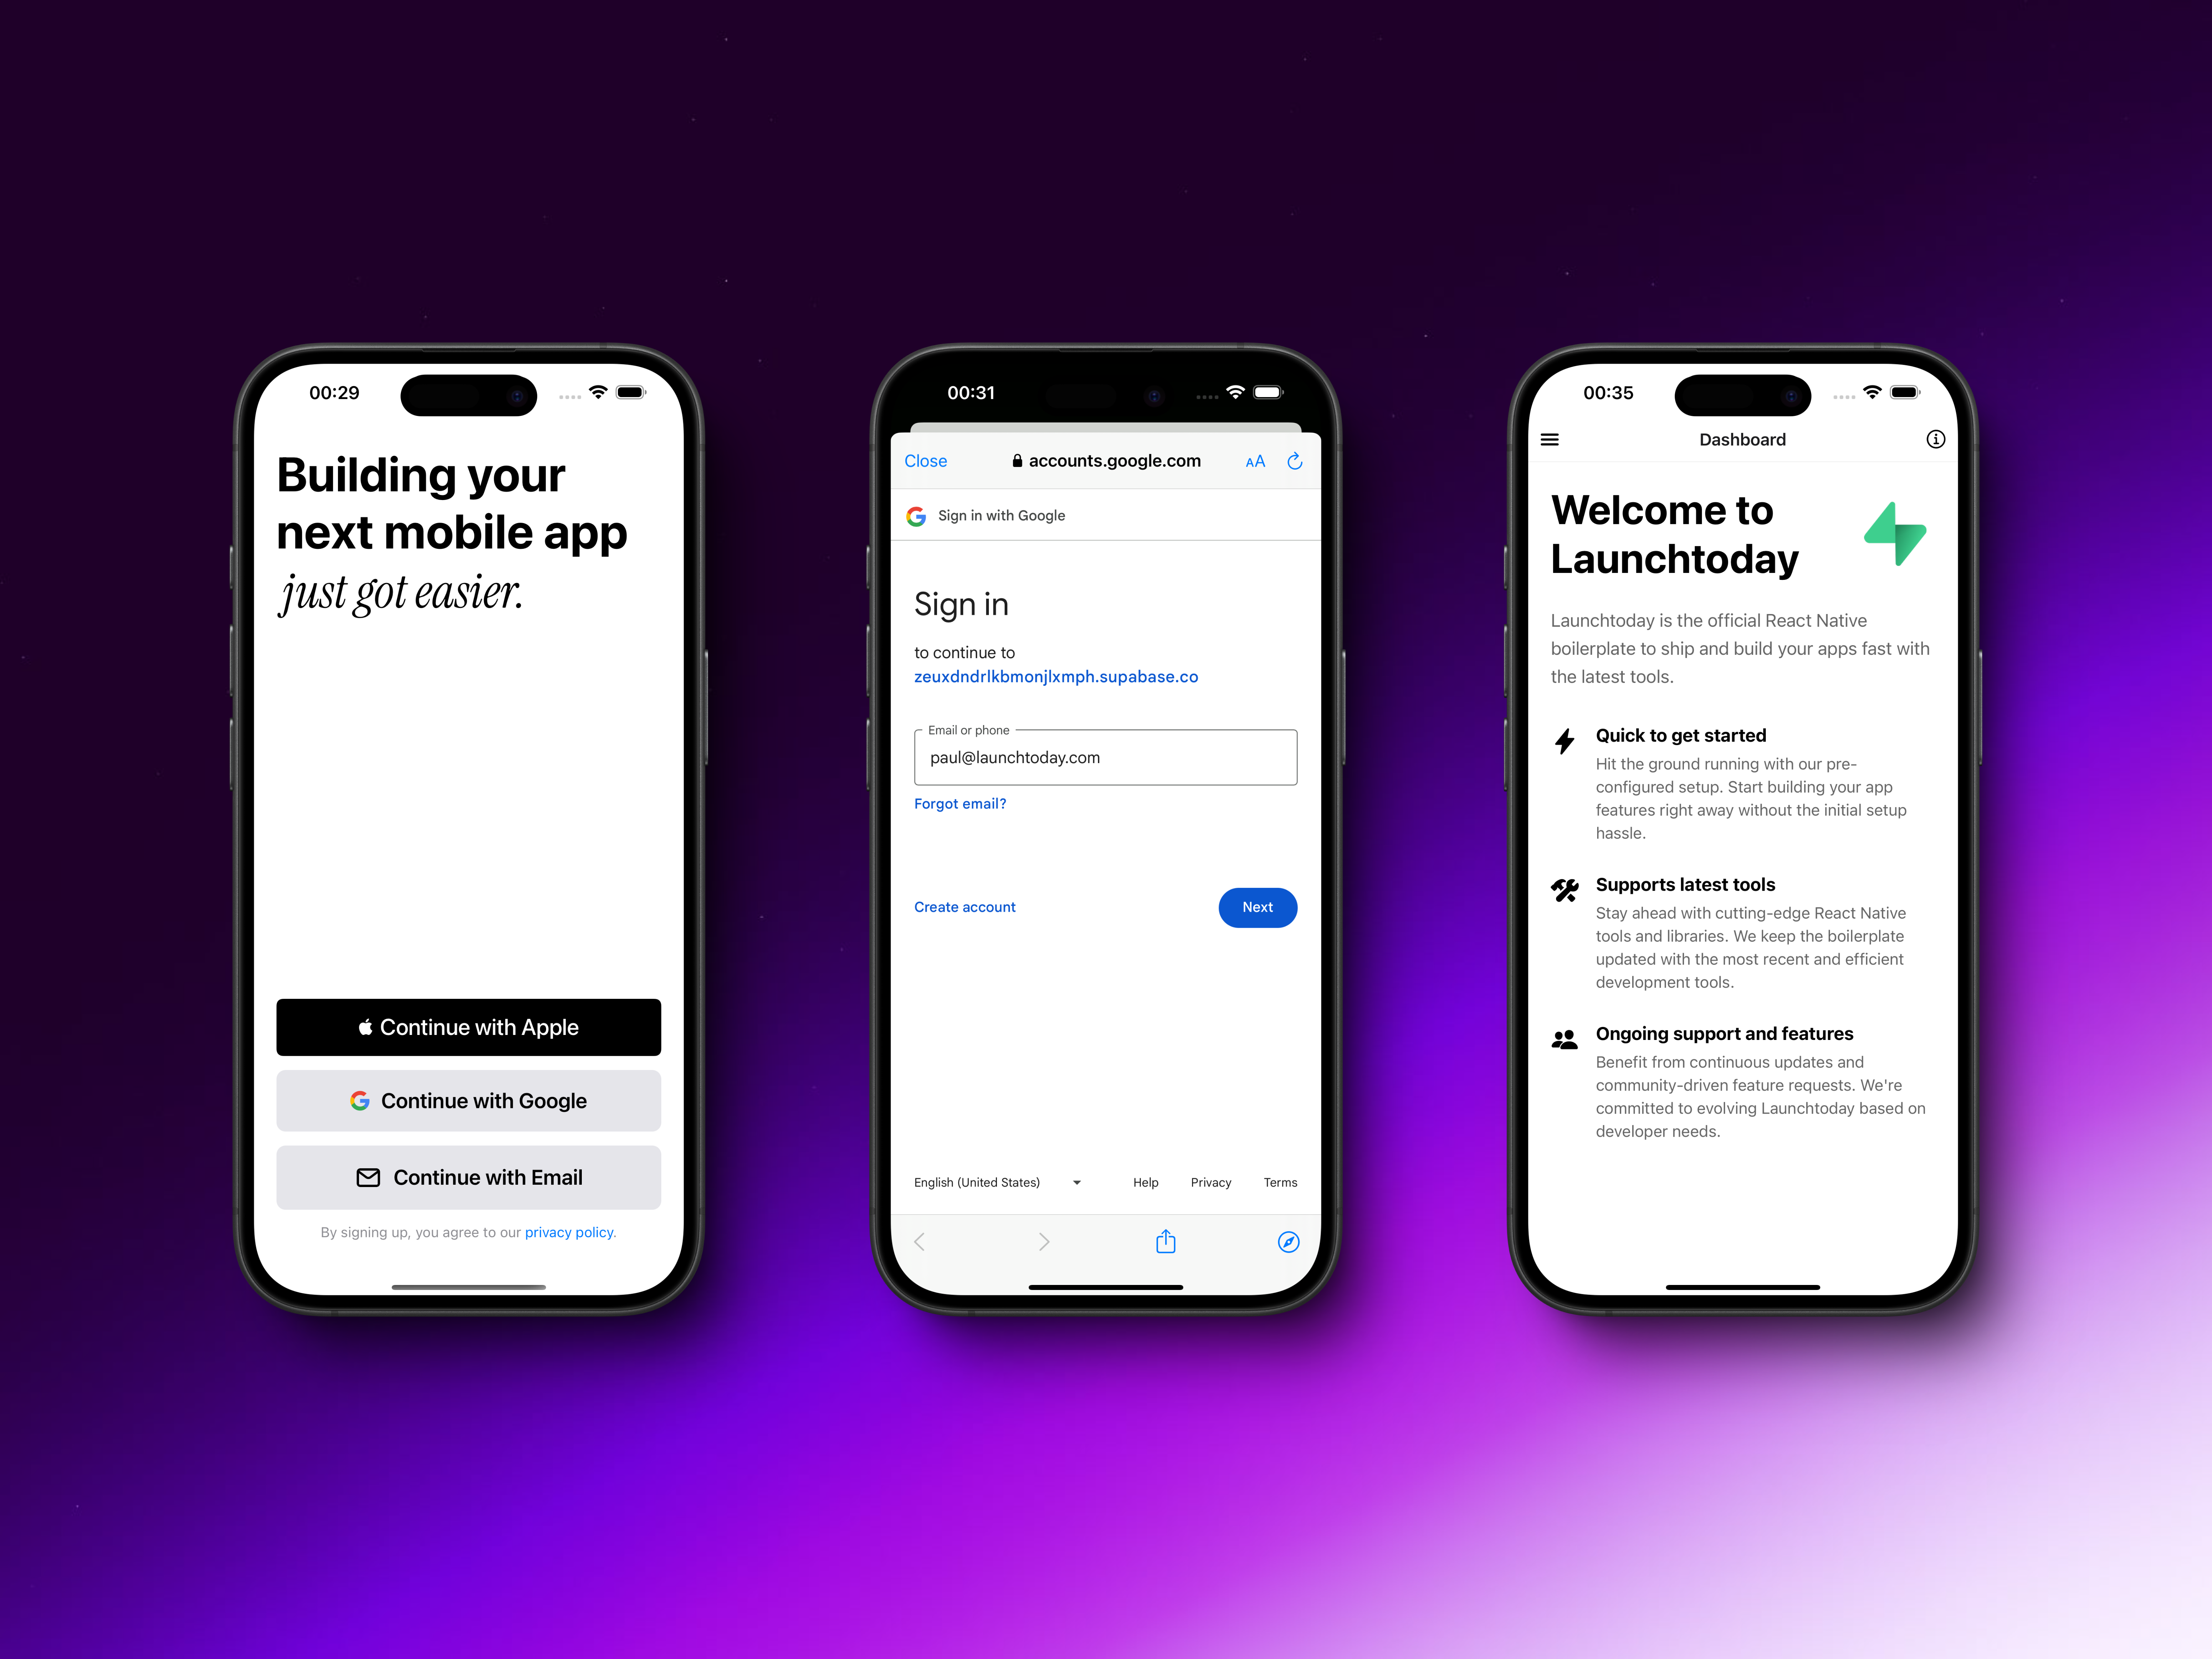
Testing the Integration
Once configured, you can test the Google Sign-in flow by running your application with eitheryarn android or yarn ios. The authentication process will present users with Google’s standard sign-in interface, where they can select their Google account and grant permissions to your application.
Remember to test both the success and failure scenarios to ensure your application handles all cases gracefully. The integration automatically manages token refresh and session persistence, providing a seamless authentication experience for both Android and iOS users.