Prerequisites
Before beginning the setup, ensure you have:- A Stripe account
- Sign up at stripe.com
- Complete the basic account verification
- API Keys from your Stripe Dashboard
- Navigate to Developers > API Keys
- You’ll need both Publishable and Secret keys
Keep your Secret Key private and never expose it in your client-side code. The
Secret Key should only be used in your backend services.
Setup Process
1. Environment Configuration
Launchtoday already includes the Stripe integration code. To activate it, add your Publishable Key and Secret Key to your.env file (ignore the STRIPE_MERCHANT_IDENTIFIER - this is covered later in the guide):
2. Stripe Provider
The Stripe provider is already implemented in Launchtoday (view in Github). The provider:- Automatically reads Stripe credentials from your environment variables
- Provides warning messages if credentials are missing
- Exports
initPaymentSheetandpresentPaymentSheetutilities for payment processing - Wraps Launchtoday with Stripe’s context provider
 Android:
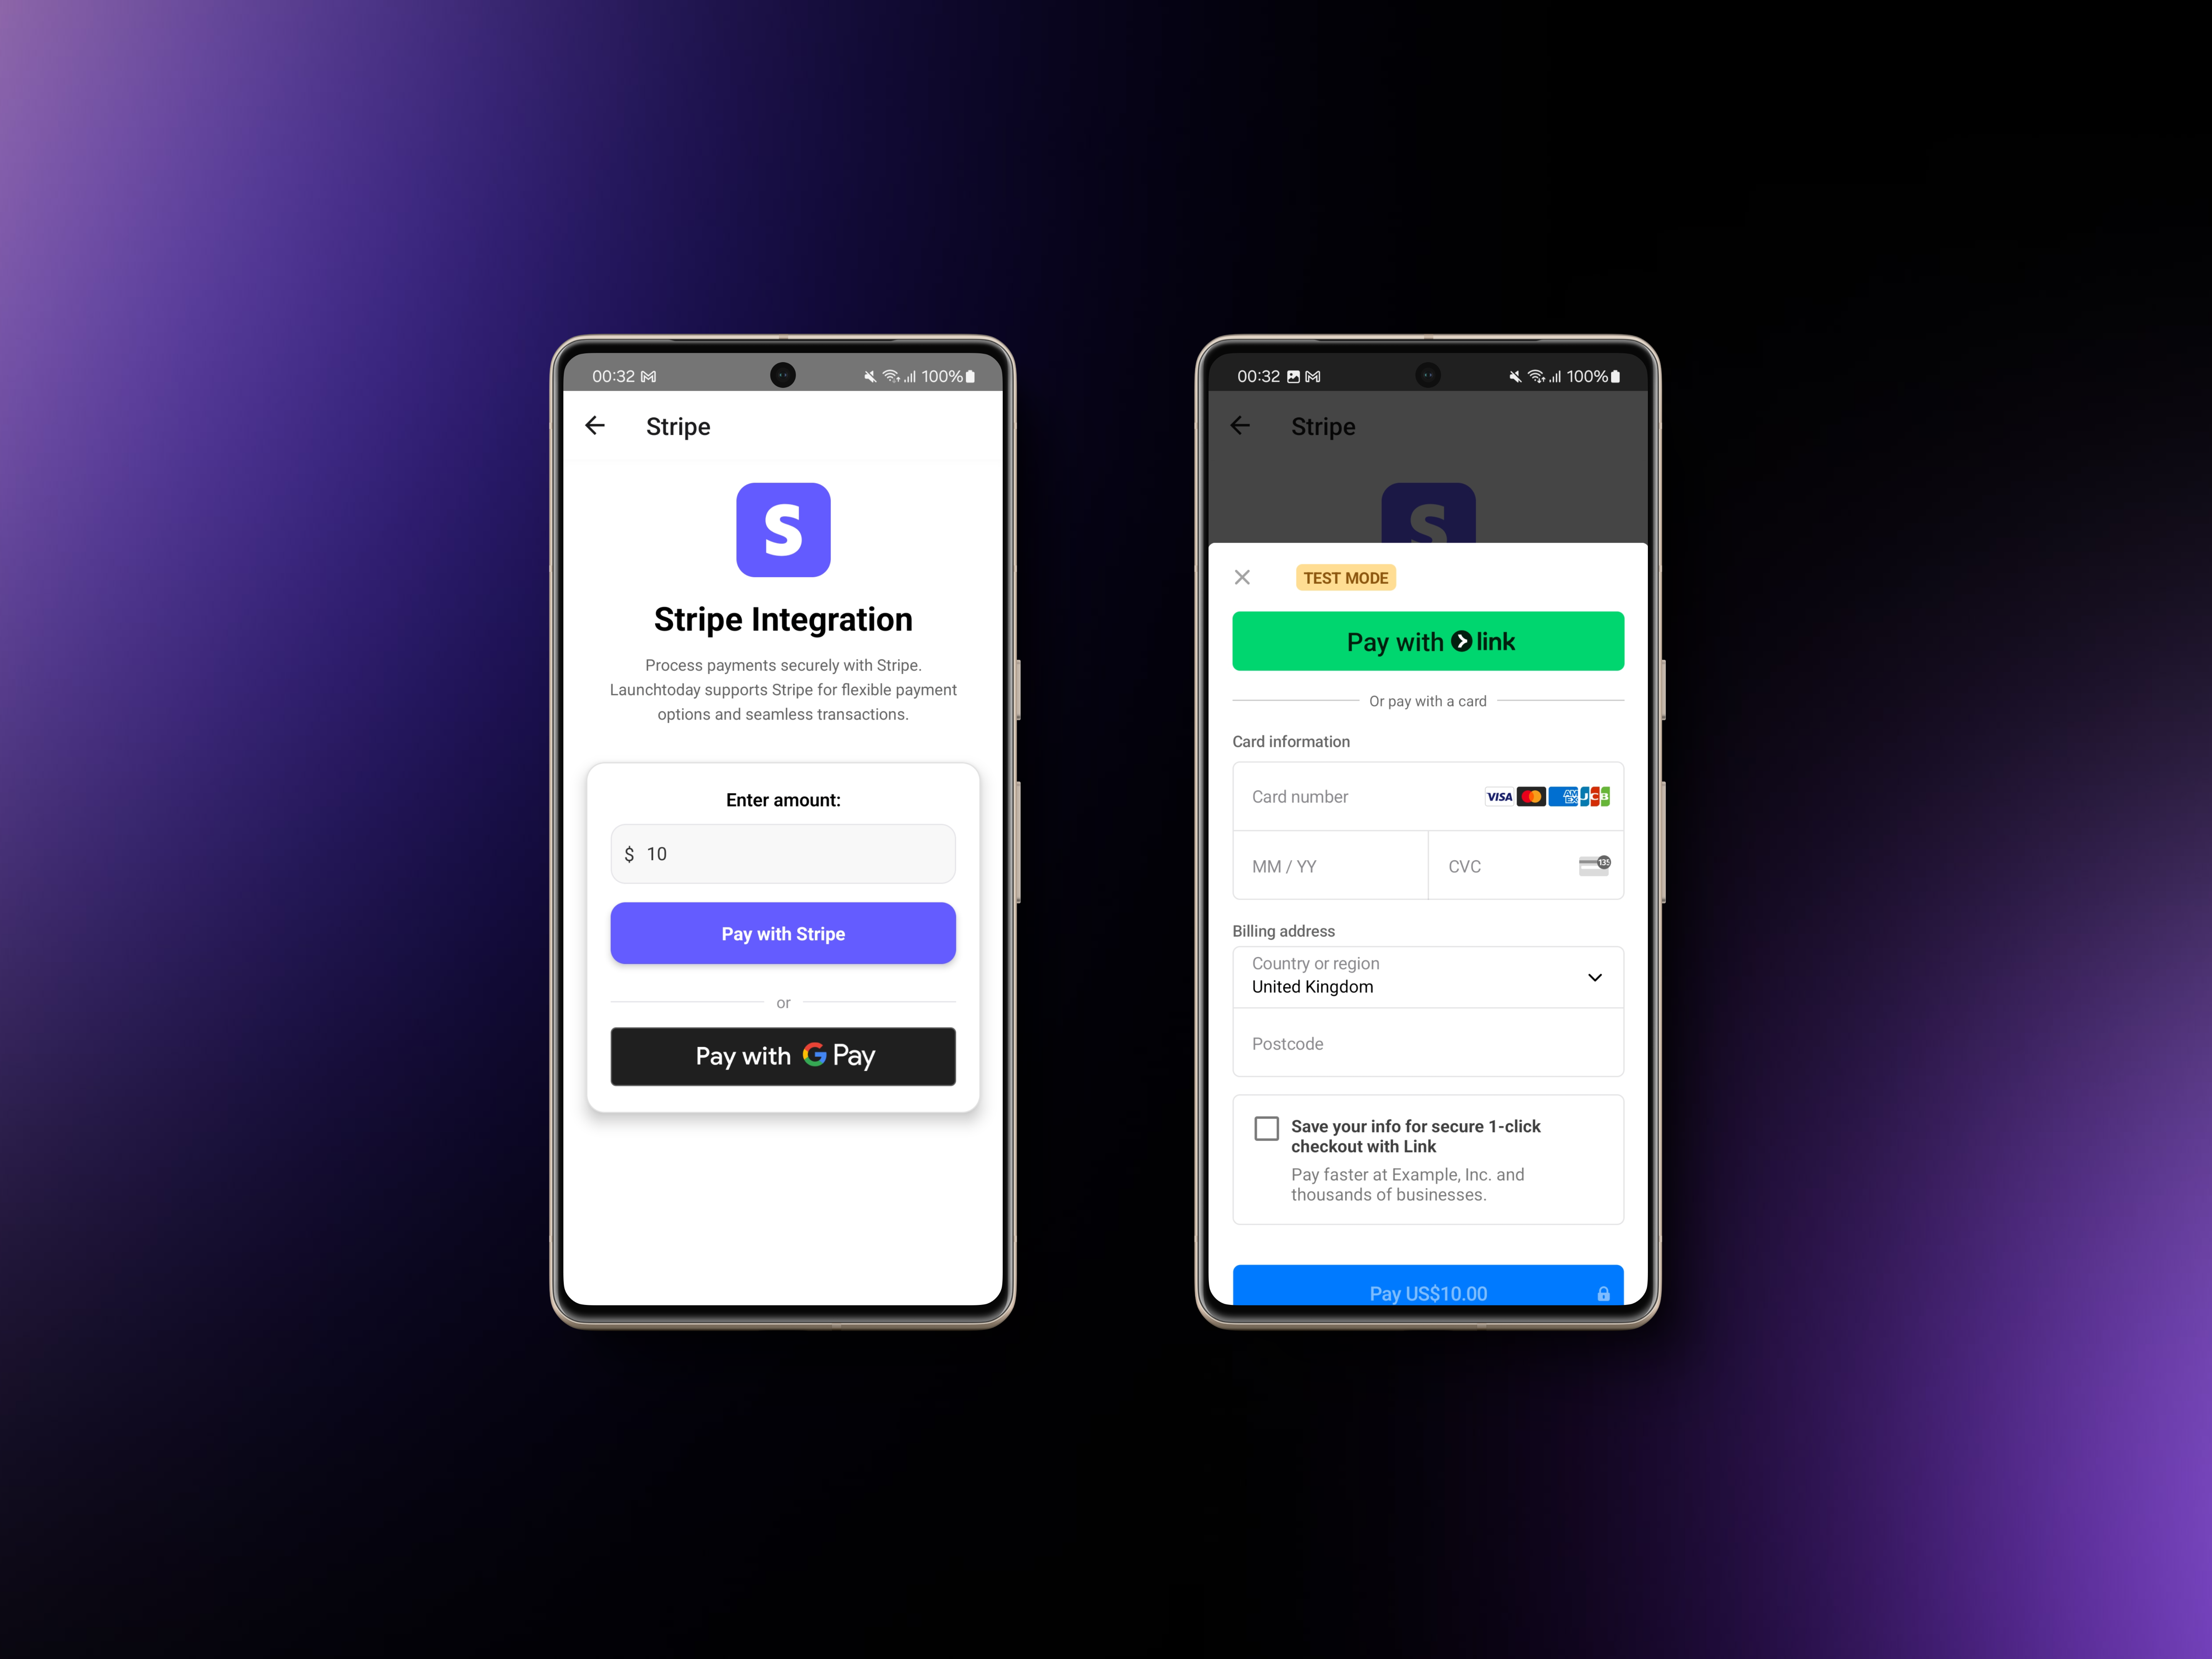
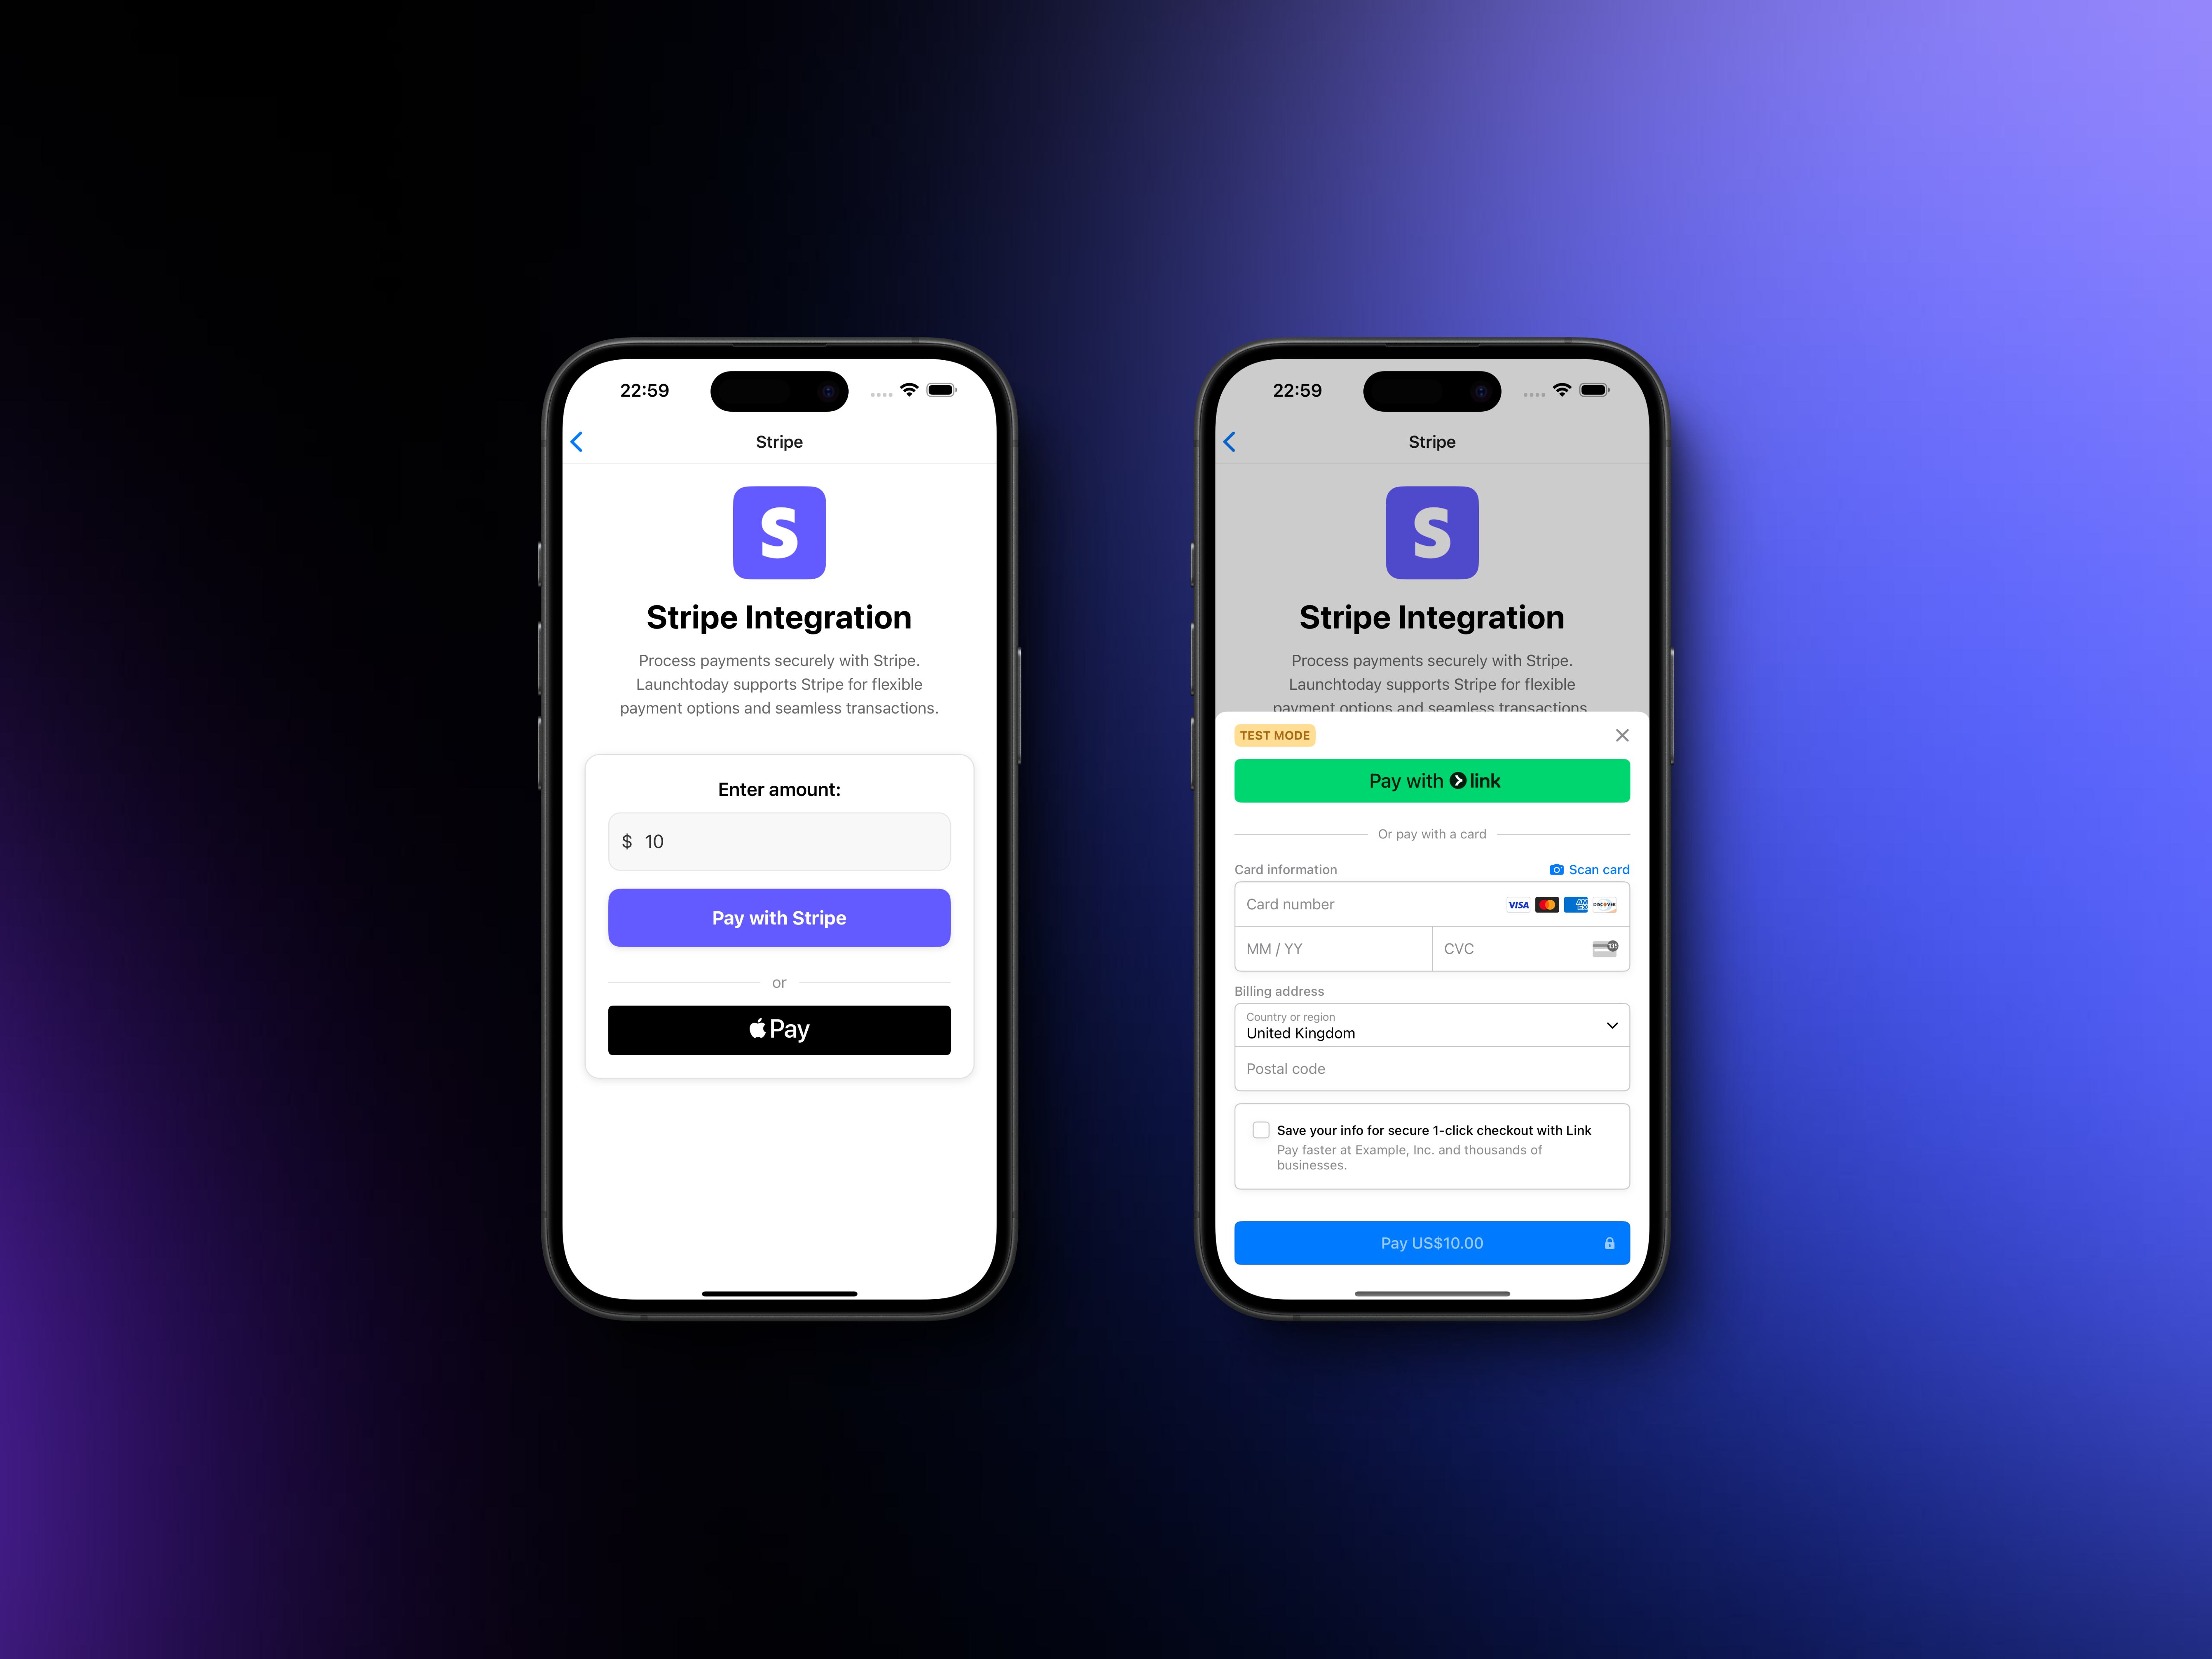
Apple Pay and Google Pay Support
Launchtoday comes with built-in support for both Apple Pay and Google Pay, requiring minimal setup to get started. These platform-specific payment methods are automatically detected and enabled when available on the user’s device, providing a seamless checkout experience.Apple Pay
To set up Apple Pay in your application, including registering for an Apple Merchant ID and creating the necessary certificates, follow the official Stripe guide here. As part part of the Apple Pay setup, you should have been prompted to create amerchant.com.{{YOUR_APP_NAME}} identifier. In your .env file, add this identifier to the STRIPE_MERCHANT_IDENTIFIER variable as shown in the example below:
Google Pay Support
Google Pay is already configured in Launchtoday and requires no additional setup. For detailed information about Google Pay integration and testing, refer to the official Stripe guide here. Below is an example of what the Google Pay payment component looks like and how it works:Testing Your Integration
During development, Stripe provides a comprehensive set of test card numbers to simulate different payment scenarios. The most commonly used test cards are:| Card Number | Scenario |
|---|---|
| 4242 4242 4242 4242 | Successful payment |
| 4000 0000 0000 9995 | Failed payment |
Monitoring & Debugging Your Integration
Monitoring your Stripe integration is crucial for maintaining a healthy payment system. The Stripe Dashboard provides a comprehensive view of all payment activity, including successful transactions, failed attempts, and detailed error messages. You can access this information at any time through your Stripe Dashboard. During development, Launchtoday automatically enables detailed logging for Stripe-related activities. These logs can be particularly helpful when troubleshooting integration issues:Preparing for Production
Before launching your application with live payments, there are several important steps you need to complete to ensure a smooth transition to production:- Complete Stripe’s verification process - this is required for processing real payments and helps prevent fraud
- Replace your test environment variables with live API keys
- Conduct thorough testing with real cards in a staging environment
- Implement comprehensive error handling for all possible payment scenarios
- Update your application’s privacy policy and terms of service to reflect your payment processing practices
A critical best practice is to thoroughly test your payment integration in
development mode before switching to live mode. Never use test API keys in
production, as this can lead to failed payments and security vulnerabilities.